Peppermint Oreo Cake
My most popular Oreo cake recipe - with a peppermint candy cane twist! This Peppermint Oreo Cake is perfect for Christmas!
Servings: 16 servings
Calories: 771kcal
Equipment
- Squeeze bottle (or piping bag or spoon; to add drip)
Ingredients
Peppermint Oreo Cake Layers
- 3 ¼ cup all-purpose flour
- 3 cup granulated sugar
- 2 ½ teaspoon baking powder
- 1 teaspoon salt
- 1 cup unsalted butter (or 2 sticks, room temperature)
- 2 teaspoons clear vanilla extract
- 5 eggs
- 1 ½ cups buttermilk room temperature
- ⅛ cup vegetable oil
- 12 crushed Oreos (fold in gently at the very end)
- 1/2 cup crushed peppermint candy or peppermint sprinkles (fold in gently at the very end)
Cream Cheese Buttercream Frosting
- 8 ounces one package cream cheese, softened (one package; softened)
- 1 cup butter (or 2 sticks, softened)
- 6-7 cups powdered sugar
- 2-4 Tablespoons milk
- 2 teaspoons peppermint extract
- ¼ teaspoon salt if using unsalted butter
- 6-8 crushed Oreos (fold in gently at the very end)
Chocolate ganache drip
- 1 cup chocolate chips
- ¾ cup whipping cream
Decorations
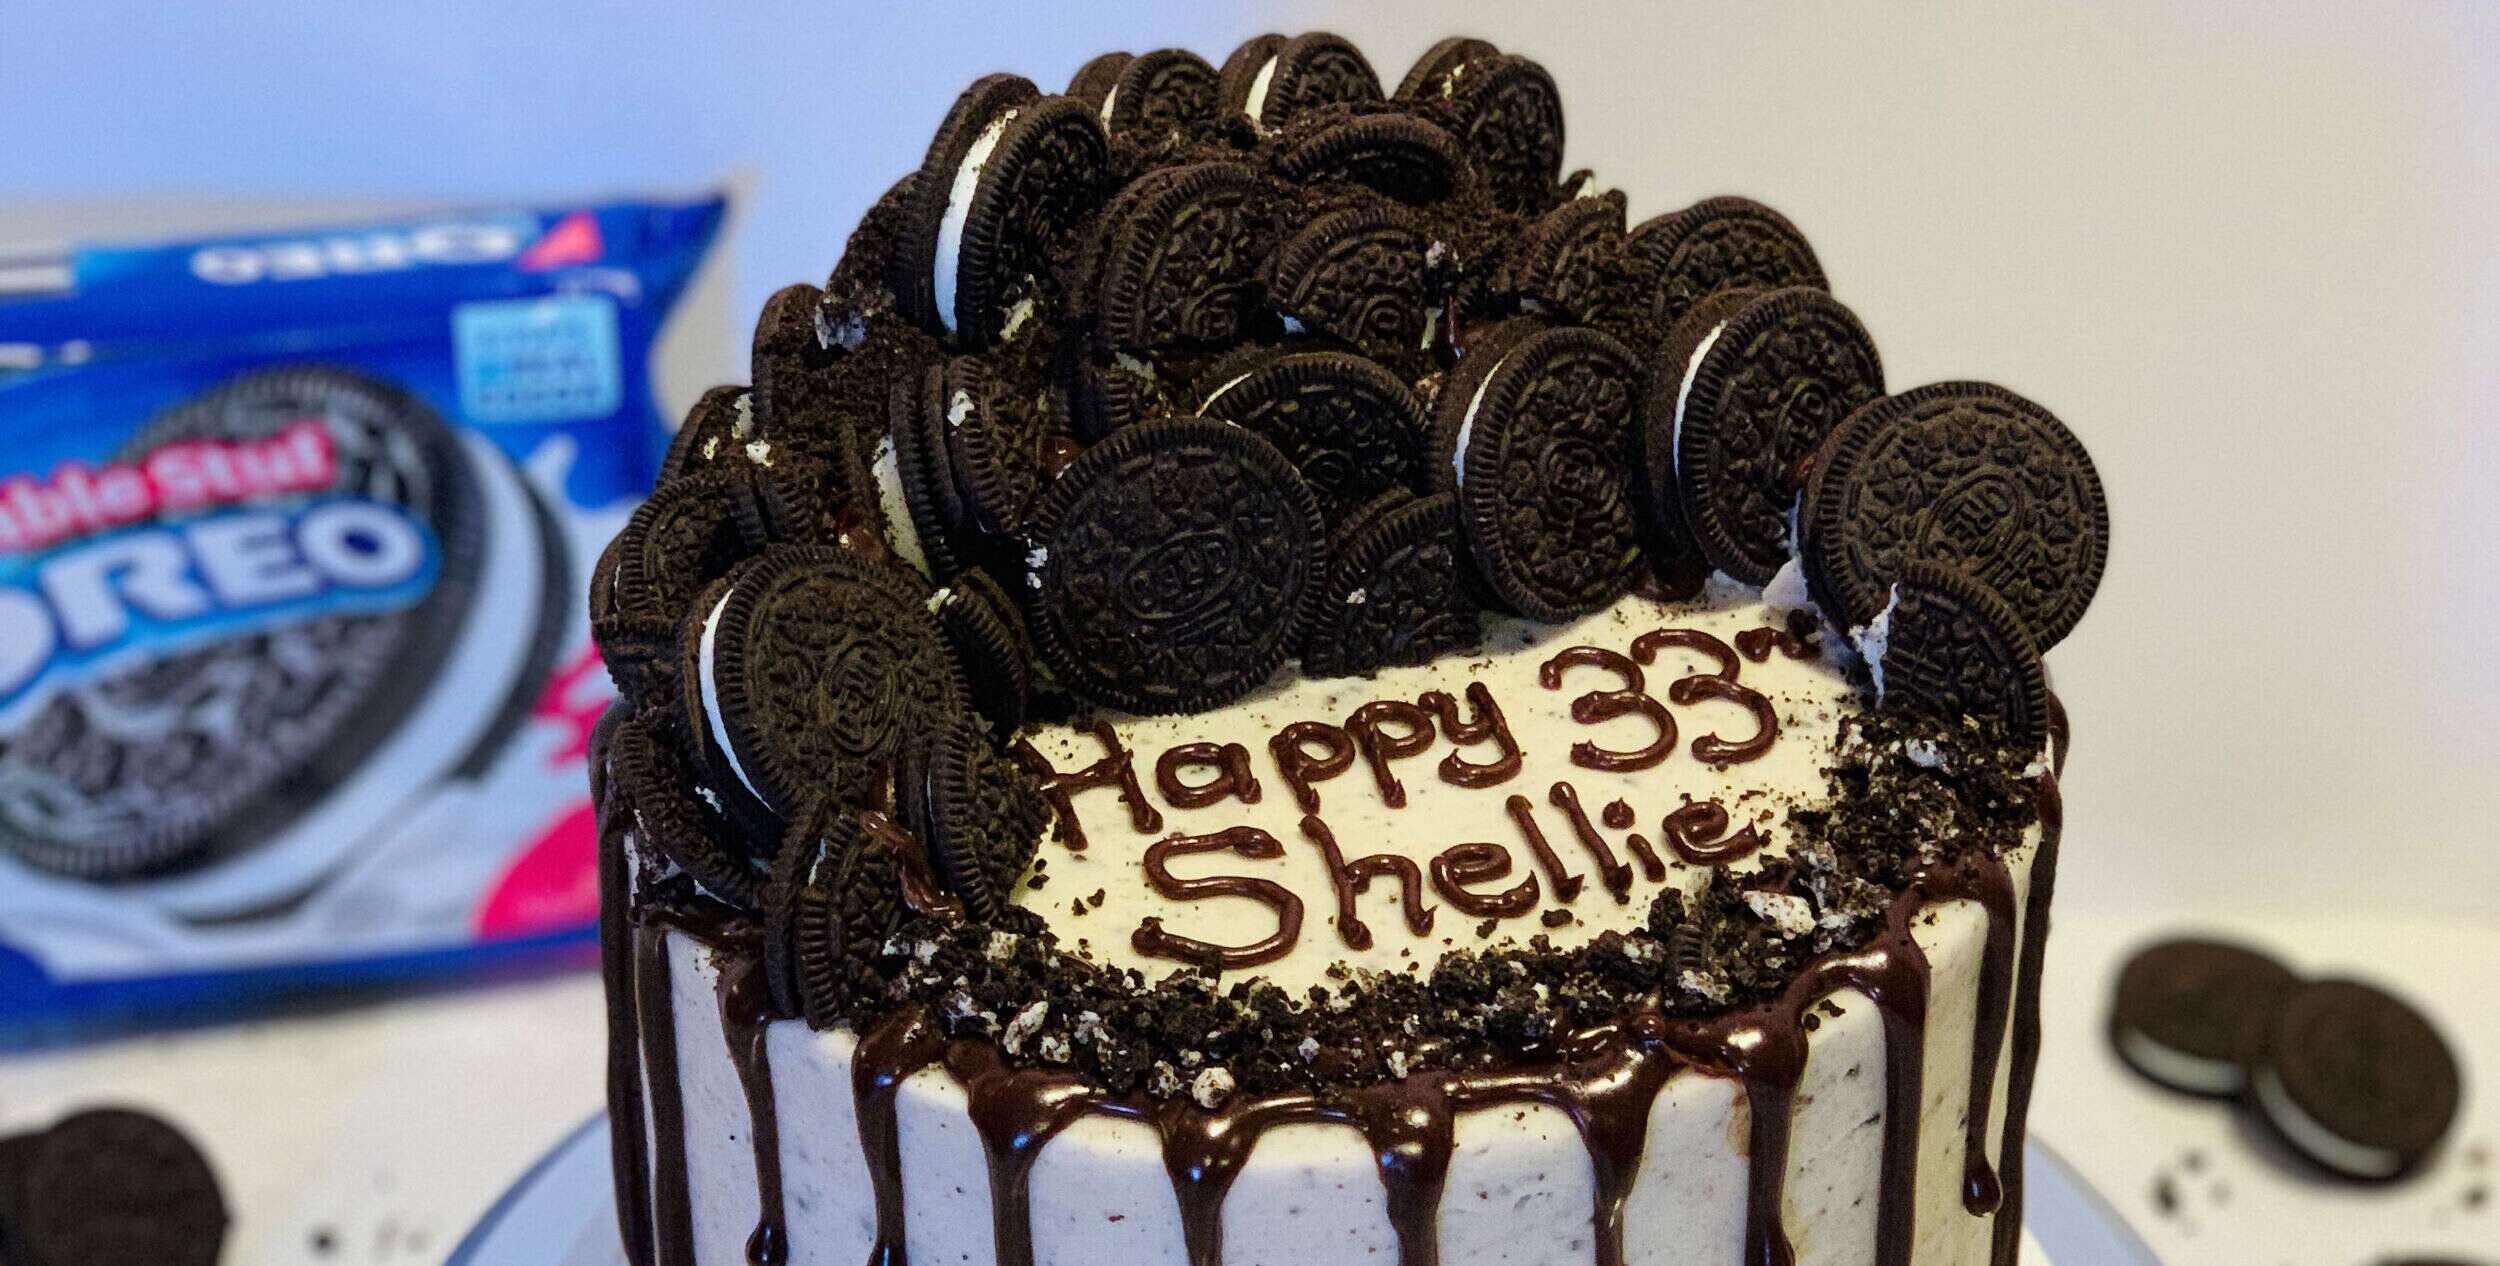
- 8-12 Oreo cookies whole (for decorating)
- 6-8 crushed Oreos (for decorating)
- ¼ cup crushed peppermint candy (for decorating)
- ¼ cup Sprinkles of your choice (optional; I used a white/silver mix similar to this one)
Instructions
Peppermint Oreo Cake Layers
- Preheat oven to 350°F. Prepare three 8-inch cake pans with baker's floured cooking spray, or grease and line with parchment rounds.
- Mix together all dry ingredients (flour, sugar, baking powder, and salt) in a stand mixer until fully combined. Mix room-temperature butter slowly into the dry mix about a tablespoon at a time, on a low speed. Continue to mix until no large chunks of butter remain, and the mix looks crumbly.
- Pour in eggs and mix on low until just incorporated. Mix in the buttermilk on a low speed. Add in vanilla and oil, and mix at a low speed until fully incorporated.
- Scrape down the sides of the bowl with a spatula, then beat on medium speed for about 30 seconds. Stir in crushed oreos and sprinkles – the I stirred as little as possible after this point, to keep the Oreo crumbs from turning my cake layers brown and the peppermint from turning them pink!
- Divide batter evenly between the prepared cake pans (I find a kitchen scale helpful for this part). This guarantees your layers will bake to be the same height.
- Bake for 33-37 minutes (or until a toothpick comes out clean). Allow cake layers to cool for 10-15 minutes on a wire cooling rack before removing from pans – it helps to run an offset spatula or knife around the perimeter of the pan first. Cool completely before frosting. Set in the fridge or freezer to accelerate the cooling process if desired.
- Once the layers have fully cooled, they can be trimmed and any caramelized bits can be trimmed from the sides / top of the cake using a serrated knife if desired. Be sure the layers are completely cooled or chilled before trimming. If you try to trim the layers while they’re still warm, they will crumble apart. (This is a great time to make your frosting!)
Cream Cheese Buttercream Frosting
- Beat together softened cream cheese and butter; slowly add in powdered sugar alternating with milk until frosting reaches desired consistency. Add vanilla and salt if needed and beat until well combined.
- (I've over-mixed Oreo frosting before and turned the color too brown - and had to make another batch for the outer layer. Stir as little as possible if you want your frosting to stay light in color!)
Assembly
- Place a smear of frosting on your cake circle (to keep the cake from sliding while you decorate it) and center your first cake layer in the center of the circle. Spread the layer with frosting. Feel free to sprinkle on some crushed Oreos if you’d like! Repeat the process with your remaining cake layers.
- Now you're ready to crumb-coat . If you're unfamiliar with crumb-coating, it's just what it sounds like – spreading a thin layer of frosting over the entire outside of the cake to keep crumbs out of your final layer. I usually do this with my large offset spatula.
- Once your crumb coat has set (this takes about 5-10 minutes in the fridge), add your final layer of frosting and smooth. I like to use an offset spatula and bench scraper for this part. As I worked through this part I had to pull out a few larger Oreo chunks that were getting in the way of smoothing my frosting. Fill in the holes with a bit of extra frosting and keep smoothing.
- Once your sides are smooth, set the cake in the fridge or freezer for 10-15 minutes to set the frosting and chill the cake so your ganache drip will set.
Cake drip
- Meanwhile, make your ganache. Place chocolate chips in a microwave-safe bowl. Add heavy whipping cream and microwave on half power in 30-second intervals, stirring in between until smooth.
- Allow to cool to a moderate temperature – it should feel slightly warm and still be fairly liquid. Transfer to a squeeze bottle or piping bag. A spoon will work if you don’t have either of those, I've just found spoons to be a little bit more difficult to work with.
- Slowly drizzle ganache around the upper edge of your cake, pausing every inch or so to let more ganache fall in a drip down the side of the cake. Add enough to the cake top to cover the cake, and smooth with an offset spatula.
Decorating
- This last step is time-consuming and completely optional, but I used a bit of vegetable shortening to ‘sticky-ify’ one of my fingers to add some sprinkles and crushed peppermint candy to my ganache drip. Up to you! Super cute, but it does take some extra time to stick on all those sprinkles.
- Add several large swirls to the top rim of the cake – I used my largest most-open star for this, so the Oreo chunks wouldn’t clog the piping tip.
- Space Oreo cookies in between the frosting swirls, add some crushed Oreos and sprinkles to the tip and base rim of the cake – and you’re done! Enjoy!
Video
Notes
(Please note nutrition information is an estimate and may not be exactly accurate.)
Nutrition
Serving: 1slice (1/16th cake) | Calories: 771kcal | Carbohydrates: 103g | Protein: 8g | Fat: 38g
Did you make this Peppermint Oreo Cake?
Let me know how it went - or find me on Pinterest or on Instagram and tag @IntensiveCakeUnit in your photo!
You can also add a comment or a recipe rating at the bottom of the page! 🙂
Related
Cream Cheese Buttercream Frosting
Other recipes you may love...
(Click / tap the photos to be taken to the recipe pages!)