
Don't forget to pin for later!


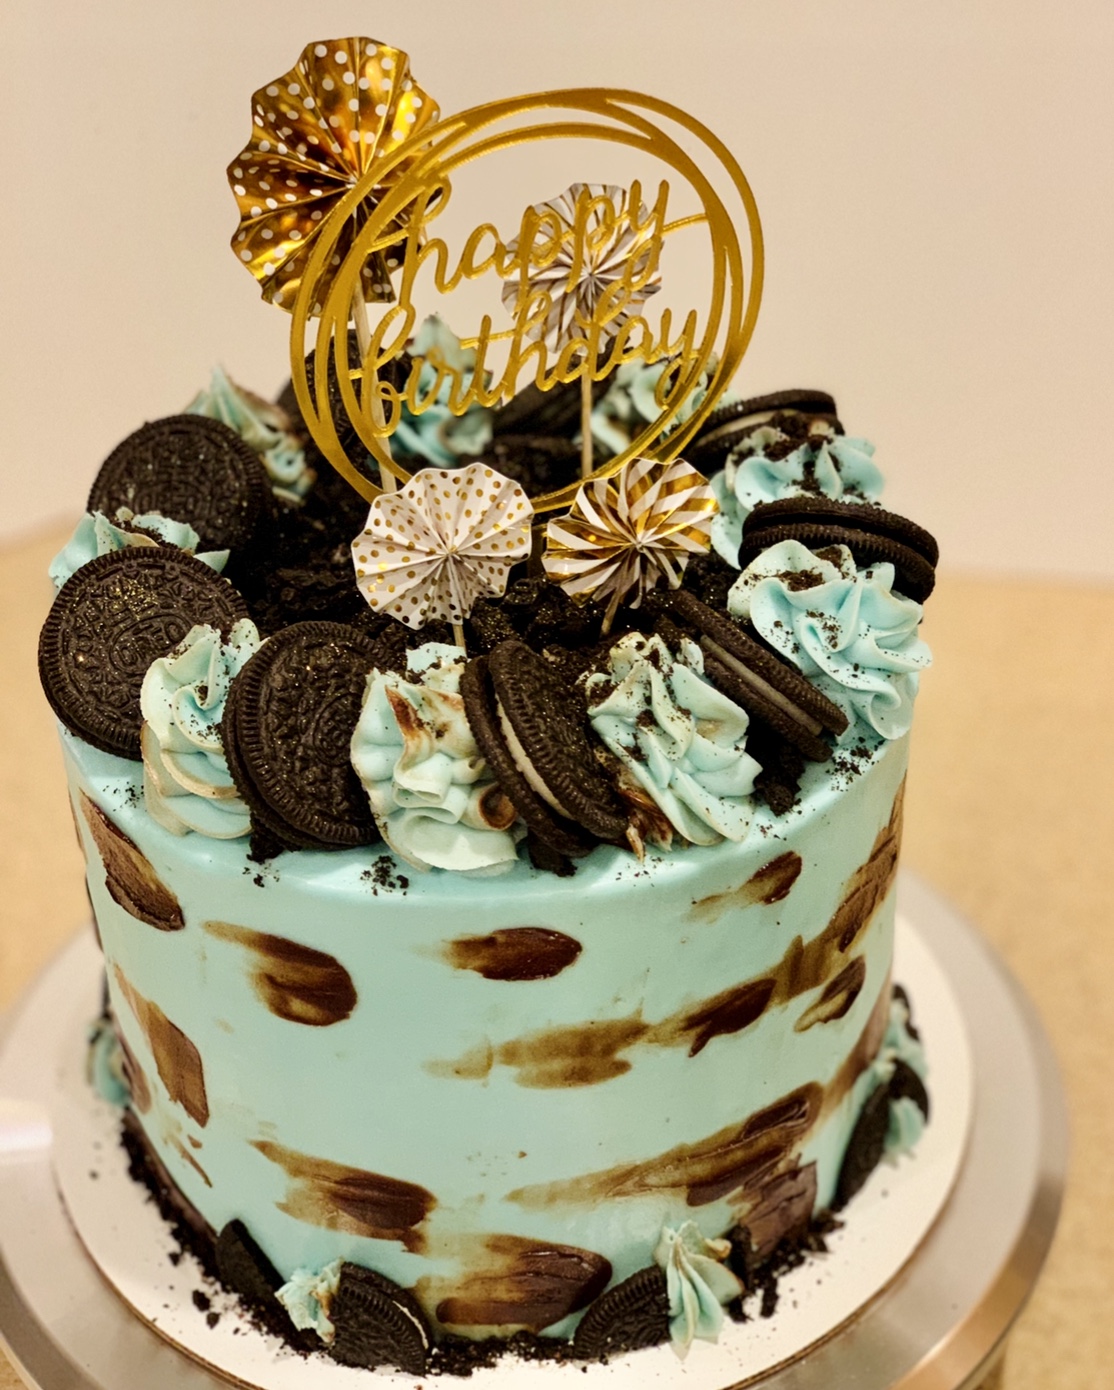
Oreo Overload Cake
A delicious cake featuring a chocolate ganache drip, cookies n cream cheese frosting, and a mountain of Oreos - make this Oreo Overload Cake!
Servings: 16 servings
Calories: 782kcal
Equipment
- 1 10 inch cardboard cake circle (an 8-inch circle would work; I've just found transporting cakes easier on larger circles)
- small piping bag + small round tip (to add lettering & ganache drip to cake)
- large piping bag + open star tip (for decorating)
Ingredients
Oreo Overload Cake layers
- 2 ¼ cups all purpose flour (350g
- 2 ¼ cups granulated sugar (450g)
- 1 ¼ cup cocoa powder (100g)
- 1 tsp baking soda (5g)
- ¾ tsp salt (4g)
- 1 cup unsalted butter (2 sticks/250g; softened)
- 4 large eggs (at room temperature)
- 1 ½ cups buttermilk (350mL)
- 2 tsp vanilla extract
Oreo Cream Cheese Frosting
- 8 ounces cream cheese (one package; softened)
- 1 cup butter (two sticks, softened)
- 6 cups powdered sugar
- 2-4 Tablespoons milk
- 1 Tablespoon clear vanilla extract
- ¼ teaspoon salt (if using unsalted butter)
- ¾ cup Oreo cookie crumbs
Filling, Drip, & Decorations
- 6 oz semisweet chocolate chips (1 cup)
- 6 oz heavy whipping cream (¾ cup)
- 1 package Oreo cookies (I used Double Stuf - chop 8 to fill the cake; save the rest for decorating)
Instructions
Oreo Overload Cake layers
- Preheat an oven to 350 degrees F (180C). Prepare three 8 inch round pans with baker's floured spray (or grease and line with parchment rounds).
- Mix together dry ingredients (flour, sugar, cocoa powder, baking soda, and salt) in the bowl of a stand mixer with a paddle (or hand mixer or whisk) until well combined. Add in bits of softened butter, mixing until no lumps of butter are visible and the mixture looks crumbly.
- Whisk together eggs, buttermilk, and vanilla. Add to dry ingredients and mix until no dry ingredients are visible. Scrape down the bowl and beat for another 20 seconds. Fill the three pans evenly - I find a kitchen scale helpful for this part, and each of mine weighed out to about 550g.
- Bake for 30-35 min or until a toothpick inserted comes out clean. Allow cake layers to cool for 10-15 minutes on a wire cooling rack before removing from pans, and cool completely before frosting. Set in the fridge or freezer to accelerate the cooling process if desired. (This is a great time to make your frosting!)
Oreo Cream Cheese Frosting
- Beat together softened cream cheese and butter; slowly add in powdered sugar alternating with milk until frosting reaches desired consistency. Add vanilla and salt and beat until well combined. When you're ready to frost the cake, stir in the Oreo crumbs - but don't stir for too long or the crumbs will soften and dissolve, turning your frosting brown!
Chocolate ganache drip
- Place chocolate chips in a heat-proof bowl. Add whipping cream and microwave on half power in 30-second intervals, stirring in between until fully melted and smooth.
Assembly
- Once your cakes are cool, level them (if needed). This can be done with a cake leveler or a large serrated knife and a ruler.
- Place a smear of frosting on your cake circle (to keep the cake from sliding while you decorate it) and center your first cake layer in the center of the circle. Spread the layer with Oreo frosting. (Optional - I piped a rim of frosting around the outer edge and filled the cake with chopped Oreos and a drizzle of chocolate ganache. Optional but recommended!) Repeat the process with your remaining cake layers, adding the final layer on top.
- Now you're ready to crumb-coat . If you're unfamiliar with crumb-coating, it's just what it sounds like - a thin layer of frosting over the entire outside of the cake to keep crumbs out of your final layer.
- Once your crumb coat has set (this takes about 5-10 minutes in the fridge), add your final layer of frosting and smooth. I like to use an offset spatula and bench scraper for this part. Once your cake is covered, place it into the fridge or freezer to set the frosting and to chill the cake in preparation for adding the ganache drip!
The fun part! Decorating!
- When your ganache has cooled to a moderate temperature – it should feel slightly warm but still be fairly liquid – transfer it to a squeeze bottle or piping bag. A spoon will work; I've just found spoons to be a bit more difficult to work with.
- Slowly drizzle ganache around the upper edge of your cake, pausing every inch or so to let more ganache fall in a drip down the side of the cake. Return cake to the fridge or freezer to set the drips.
- (If you’re piping onto the top of your cake, place the remaining ganache into the fridge to set it to a pipeable consistency for the letters. Once it’s cold enough to hold its shape, transfer it to a small piping bag fitted with a small round tip. Pipe away! I practiced a few times on a paper towel just to get a feel for what size/shape I needed the letters/numbers to be.)
- Time to start piling on the Oreos! I used a large pile in the back cascading to a small rim in the front, but you can do whatever you think looks the best! I used whole Oreos as my base layer and used small amounts of frosting and leftover ganache to stick smaller Oreo pieces onto the top and sides. Add until you’re happy with the way it looks!
- Add a rim of Oreo crumbs around the base, and press a few crumbs up into the frosting with the back of a spoon. (Or an offset spatula. Or your fingers. Whatever floats your boat! ;) ) Step back and admire your amazing Oreo Overload cake!
Video
Notes
Please note nutrition information is an estimate and may not be exactly accurate.
Nutrition
Serving: 1serving | Calories: 782kcal | Carbohydrates: 101g | Protein: 9g | Fat: 38g
Did you make this Oreo Overload Cake?
Send me an email and let me know how it went – or make my day and find me on Pinterest or on Instagram and tag @IntensiveCakeUnit in your photo!
You can also add a comment or a recipe rating at the bottom of the page! 🙂
Other recipes you may love…
(Click / tap the photos to be taken to the recipe pages!)


What do you squeeze on between layers?
Chocolate ganache; same ganache I used for the cake drip! So sorry I left that out of the instructions; was running on not quite enough sleep. Thanks for asking! I’ve fixed the recipe instructions!
Hi, Can I cover this cake with sugar paste?
You technically can; I don’t think it’ll look the same as the Oreo frosting though. Up to you!
Did you put the crushed Oreo crumbs in the cream cheese frosting to ice the outside of the cake?
I did! Just don’t mix them into the frosting for too long – or the frosting will start to turn brown as the crumbs soften and dissolve.