
Baseball Cake
Need to make a baseball cake? Not too long ago I made a golf ball smash cake for a friend’s kiddo’s […]
Need to make a baseball cake? Not too long ago I made a golf ball smash cake for a friend’s kiddo’s […]

Filled donuts have become our go-to dessert!I recently published ‘filled cake mix donuts,’ and they’ve become a go-to dessert at
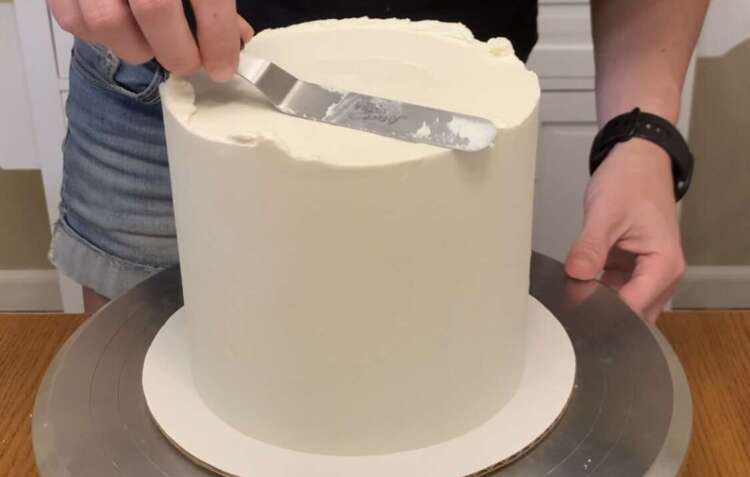
“How do I frost a smooth cake with buttercream?” Once upon a time, my only answer to that question would’ve been

It’s been One Wild year! Have you ever been on a roller coaster that really got to you? I’m not talking
I risk sounding like a broken record here…but it really feels like it was just the other month that I

Get the best of both worlds with these filled cake donuts!First – quick backstory on how these filled cake mix
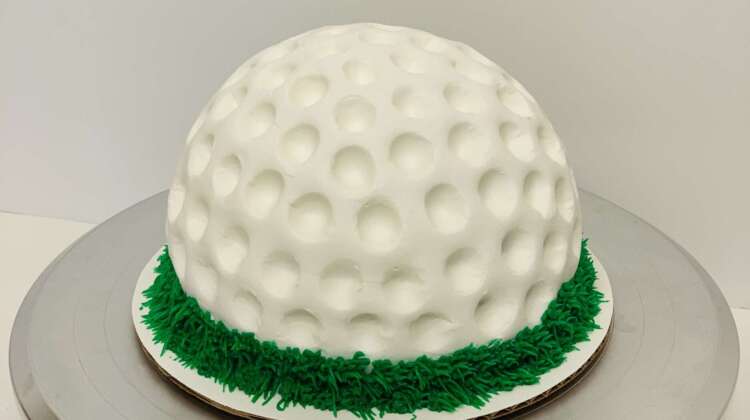
Need a golf ball smash cake – or a golf ball birthday cake?I’ve got you covered! 🙂 As conceptually simple

All aboard! All aboard! This Thomas the Train cake is a great birthday or special event cake for your little engineers
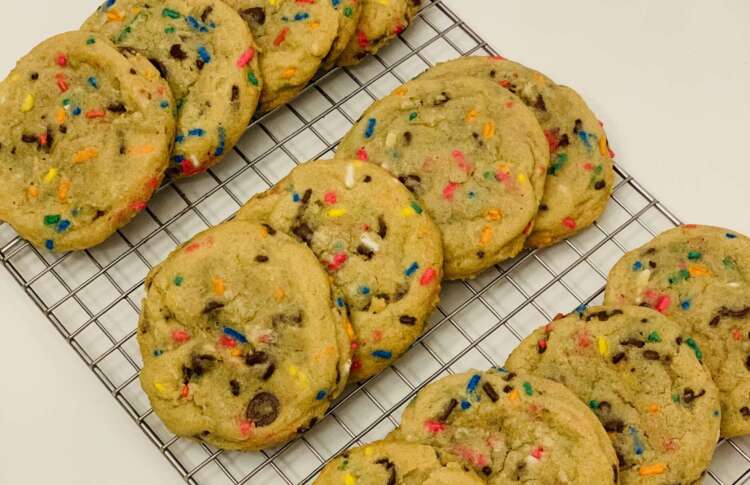
What’s better than homemade chocolate chip cookies? They really are the ultimate comfort food! They’re delightfully crispy on the outside, irresistibly

“What Will Baby Bee?” Below is my first go at the ever-popular ‘gender reveal’ cupcake – since I’m due with our

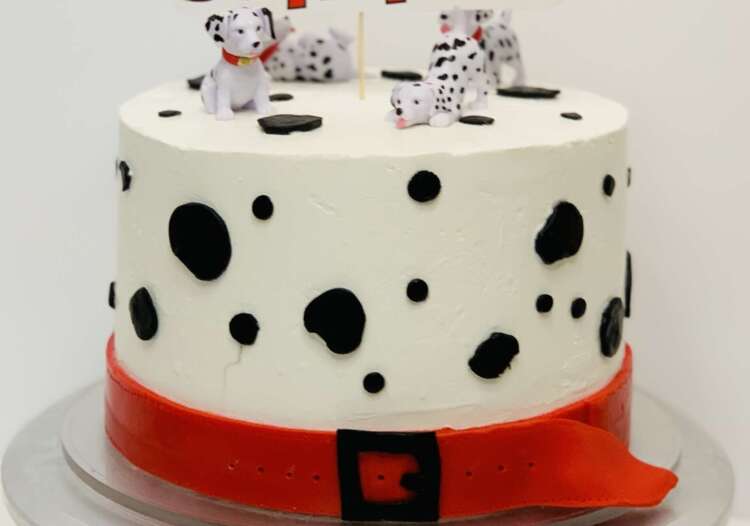
TP Cake & Poop Emoji Cupcakes”Why would anyone make poop emoji cupcakes?”Haha – valid question! 😉So I made the cake
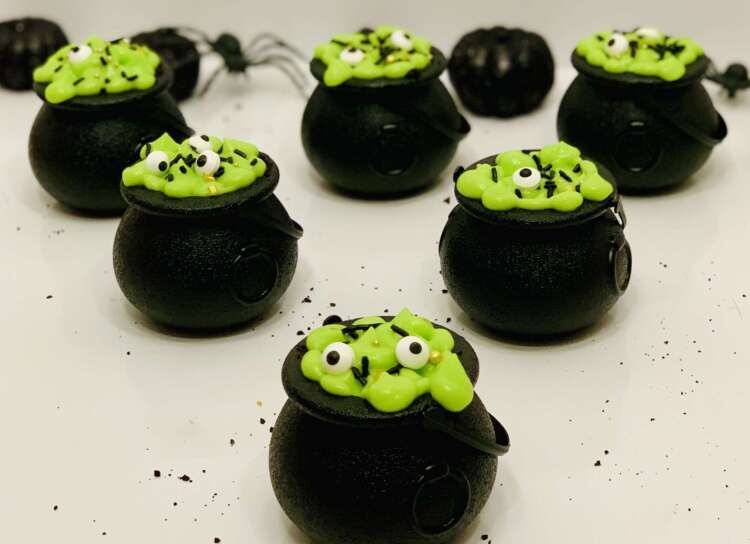
Cauldron Oreo Pudding Parfaits The perfect simple + decorative + delicious Halloween dessert!.When I saw this cauldron cups online… it

What’s the #1 issue with black frosting…?Aside from getting white buttercream to turn a deep black – many people worry

When my ‘little love bug’ turned 1 …Honestly, I had to spend some time wondering where all the time had
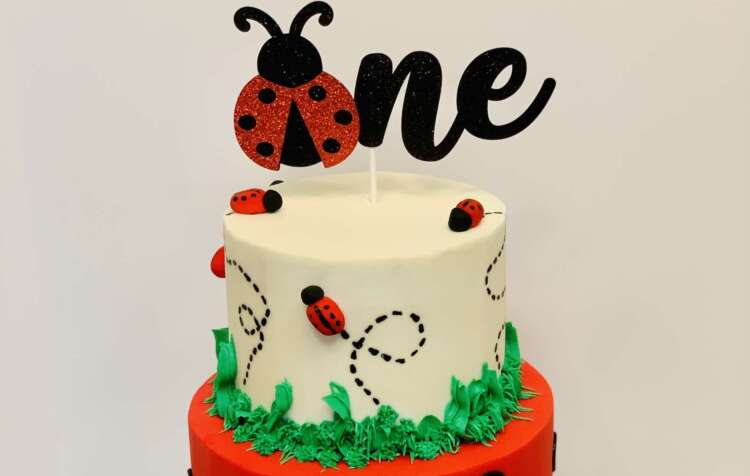
I still don’t know where the year went…My ‘little love bug’ turned 1 a few months ago (they didn’t lie;

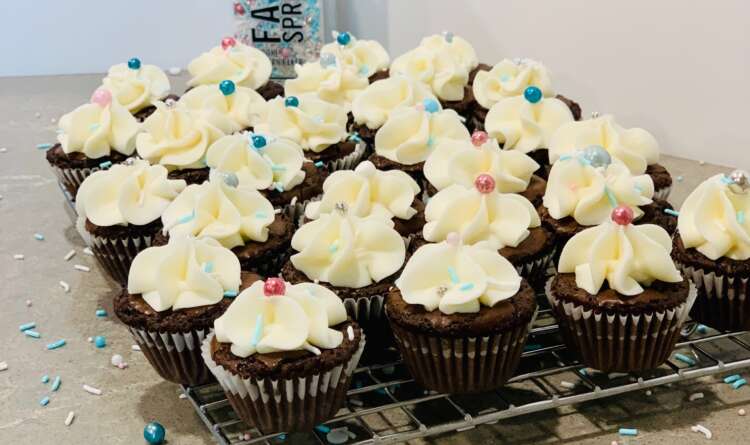
That one day plain swirls got boring…I had a batch of cupcakes to decorate, and was bored with my standard
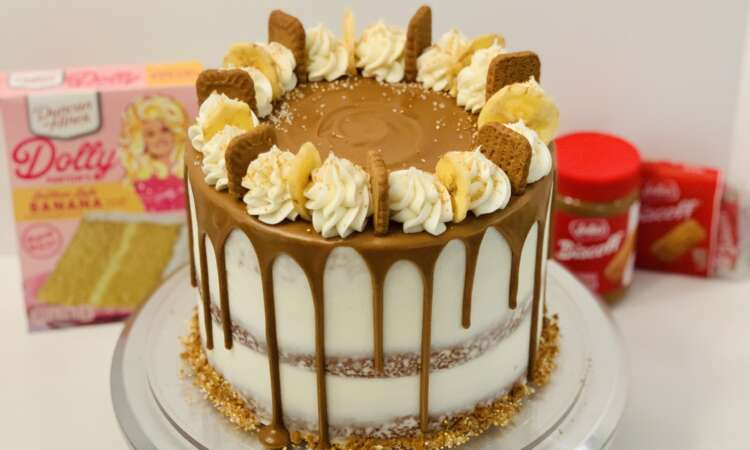
Any great cake is worth tweaking and making again, right? 😉 I recently ran across a photo of a Banana Caramel

Donuts – at home – in less than an hour? Yes please! ;)As a new mom for just about three
Twist on one of my most popular cakes…One of my all-time most popular recipe posts to date has been the
Why do I sometimes prefer brownie bites to mini cupcakes? Well…let me tell you! I was setting out desserts on a
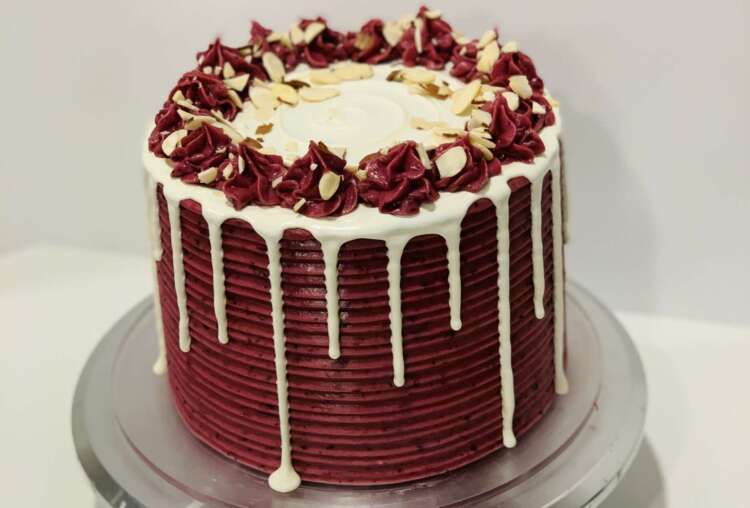
“This might be your best cake ever.”- taste tester 🙂 So – the backstory to the creation of this Almond Blackberry

One of my favorite yearly birthday cakes!Every year for my dad’s birthday – and sometimes also for Father’s Day –

Always my favorite cakes to make – I think smash cakes are just the cutest!Smash cake requests are my absolute

Nobody said sheet cakes have to be boring! It’s Girl Scout cookie season, and I got several boxes of cookies recently

Girl Scout cookie season strikes again! Welllll it’s been Girl Scout cookie season around here. So I’ve had cookies coming out